
.jpg-40x40.webp "Magnetic Snaps Buttons")

.jpg-40x40.webp "Prong Snap Fasteners for Baby Clothes")


.jpg-40x40.webp "Curved Snaps Buttons")


.jpg-40x40.webp "Snap Fasteners Half Dome type")
-no5-k0010%20(3).jpg-40x40.webp "Eyetlets")


-K0014.png-40x40.webp "Steel Eyelets and Iron Metal Grommets")

.jpg-40x40.webp "Flat Brass Eyelets and Grommets")

.jpg-40x40.webp "Aluminum Eyelets and Grommets")


.jpg-40x40.webp "Galvanized Eyelets and Grommets")


.jpg-40x40.webp "Grommet Punching Dies")
.jpg-40x40.webp "Hole Cutter Tools and Punching Dies")


.jpg-40x40.webp "Pearls Types")


.jpg-40x40.webp "Rivets")


.jpg-40x40.webp "Water-Repellent Jacket Zippers")


.jpg-40x40.webp "Tires")

.jpg-40x40.webp "Round Braided Elastic Cord")


.png-40x40.webp "Enameled Buttons")


.png-40x40.webp "Two Hole Sewing Buttons")


.jpg-40x40.webp "Carabiner Clips, Snap Hooks and Bag Hooks")


-PhotoRoom.png-40x40.webp "Spring Rings, Key Rings and Snap Clamps")


.png-40x40.webp "Hook and Eye Closures Sew-On")



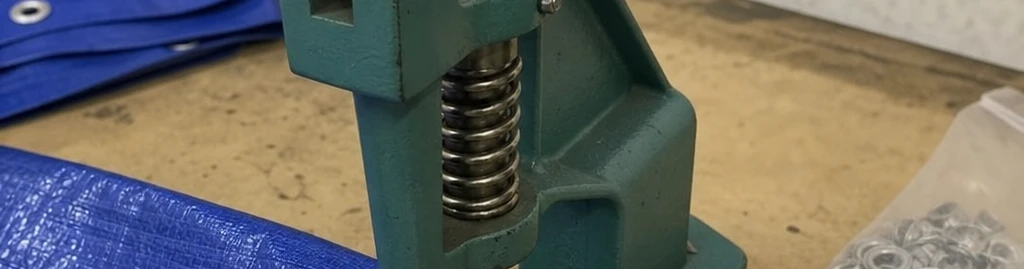
This e-Buttons guide focuses on the buying and setup decisions behind reliable grommet installation. Whether you are preparing tarpaulin, bags, leather goods or technical textiles, first identify the exact fastener and substrate construction. Then compare punching methods, setting dies and suitable press connections to build a repeatable process.
Eyelet dies and pressing tools help you make clean, strong holes in textile, leather, canvas, tarpaulin, and PVC-coated fabric. The main point is simple: punching the hole and setting the eyelet are two different steps. Each step needs the right die and the right tool. When the kuşgözü çakma aparatı, hole punch die, eyelet size, and press connection all match, the job is faster, neater, and wastes less material.
What a kuşgözü çakma aparatı does
An eyelet setting die forms and secures the eyelet, often together with a washer. With conventional systems the material is punched separately; certain verified self-piercing eyelet systems combine cutting and setting. Check the exact eyelet and die design before choosing a workflow.
A separate hole punch makes the opening, while a setting die forms the eyelet. Reverse-setting, oval and self-piercing tooling have different operating requirements and cannot be treated as interchangeable.
Illustration suggestion: eyelet punch die and setting die shown side by side. Add an original product photograph from the relevant store before publication.
The two-step process for a clean eyelet
Good eyelet work depends on order, size, and alignment. Whether you use a small manual tool, a tulumba el presi, or a kuşgözü çakma makinası, the steps are the same: prepare the material and then set the eyelet; compatible self-piercing systems may combine both steps.
1. Mark the spot
Mark the center point before you start. On soft textile, this is easy. On leather, branda, or layered canvas, careful marking keeps the hole from drifting. If the material will carry tension, leave enough edge space so the eyelet does not pull through.
2. Punch the hole with the right delme kalıbı
For example, if the specific eyelet manufacturer recommends an 8.5 mm punch, do not substitute an 8 mm punch on guesswork. The nominal eyelet number alone does not determine the correct cutting diameter: confirm the product dimensions, shank height, washer and material thickness.
3. Set the eyelet and align the die
After punching, place the eyelet in the hole and line it up under the setting die. The upper and lower die parts should sit squarely around the eyelet. If they do not, the ring can crush, tilt, or come out uneven.
4. Apply steady pressure
A press tool gives more even force than hand hammering, especially in medium-volume work. With a kuş gözü çakma makinası or tulumba hand press, you can apply force smoothly and keep the eyelet centered. For small repairs or rare use, a hammer-based kuş gözü aparatı can still work, but it needs more care.
Size fit saves material
The best habit is to treat the eyelet, hole punch, setting die, and press connection as one system. If one part does not match, the result may look fine at first and then fail later by loosening, tearing, or uneven pressing. This is costly with leather, technical fabric, and large branda panels.
Use this simple check before production:
| Selection point | What to check | Why it matters |
|---|---|---|
| Eyelet size | Nominal size and inner diameter | Sets the hole size |
| Hole punch die | Same cut size as the eyelet needs | Stops loose or forced fits |
| Setting die | Made for the same eyelet type and size | Shapes the eyelet evenly |
| Press connection | M6, 1/4 inch, or another fit | Lets the die mount to the press |
| Material thickness | Single layer, folded edge, or reinforced layer | Changes pressure and test needs |
The same approach applies to larger sizes and workshop sets: verify the included sizes and actual die compatibility instead of assuming that different nominal numbers share the same tooling.
Which tool fits your work?
The right tool depends on how often you set eyelets, what material you use, and how much consistency you need. A portable manual kuş gözü aparatı may be enough for small repairs. A dedicated kuş gözü makinası is better when you need the same result again and again.
Manual hammer tools for repairs and low volume
Hammer-based eyelet tools are low cost, portable, and useful when you only need a few eyelets at a time. They are common for repairs, hobby work, samples, and field fixes. Their main limit is control: the result depends on the user's angle, the surface, and the strike force.
If you choose this route, work on a firm base and test on scrap first. Use short, controlled hits instead of one hard blow. This lowers the risk of flattening the eyelet unevenly or hurting the material around the hole.
Tulumba hand press for workshops
A tulumba el presi is often the middle ground for small and medium workshops. It gives more control than hand hammering and helps keep the upper and lower dies lined up. For textiles, synthetic leather, canvas, and branda work, that consistency can make daily work smoother.
This setup is also useful when a shop handles different sizes. With the right dies, the operator can change sizes more safely than with improvised tools. Before buying dies, check whether the press uses a confirmed thread, shank or other connection standard.
Mechanized options for regular production
For higher output, a kuşgözü çakma makinası or branda kuşgözü çakma makinası can reduce fatigue and improve pace. These tools help when eyelets go into long runs, repeated points, or heavy technical material. The main gain is not only speed. It is the ability to keep pressure even across many parts.
Some users also search for a kapsül çakma makinası when they compare workshop presses. That comparison can be useful, but capsule, snap, rivet, and eyelet jobs do not all fit each other. Always match the machine and dies to the exact fastener you plan to install.
Before purchase, document the eyelet product code, recommended cutting size, washer style, number of fabric layers and connection dimensions of the target press. If any of these items are unknown, obtain the specifications and perform a sample test rather than relying on visual similarity.
A single press may accept different accessories when the matching dies are available, but tooling is not universal. Confirm the upper and lower die fit, thread or shank dimensions, working clearance, alignment and whether the system relies on controlled pressure or impact. A hand press designed for workshop tasks is not automatically compatible with every eyelet, snap or capsule die.
Choosing the Right Press and Die Connection
Materials where eyelet dies work well
Eyelet systems are used anywhere a strong hole is needed for tying, hanging, ventilation, lacing, or fastening. In textile work, they add neat openings to bags, curtains, garments, labels, and accessories. In leather and synthetic leather, they strengthen holes that would otherwise stretch or tear.
Branda and PVC-coated technical textiles are harder jobs because the material may be thick, slick, layered, or under tension. A branda kuşgözü çakma makinası or a strong hand press can help produce a better result, but the tool alone is not enough. You still need the right hole size, the right eyelet length, and a test sample before full production.
Canvas and outdoor fabrics also need testing. Coatings, backing layers, and folded seams can change how the eyelet compresses. If you work near an edge, around a reinforced corner, or through several layers, test both punching and pressing before you move to the final piece.
A simple setup checklist
Before you install eyelets on valuable material, run through a short setup check. This prevents most avoidable mistakes and helps new operators work with more confidence.
- Confirm the eyelet size and recommended hole diameter.
- Pick a delme kalıbı that matches the needed hole, not an estimate.
- Use a setting die made for the same eyelet size and style.
- Check the press thread or connection type, such as M6 or 1/4 inch.
- Test on scrap material with the same thickness and layers.
- Inspect the back side of the eyelet after pressing for even curl and grip.
- Adjust pressure if the eyelet cracks, bends, turns, or stays loose.
- Keep punch edges clean so holes stay neat and repeatable.
Illustration suggestion: workshop hand press setting an eyelet into tarpaulin fabric. Add an original product photograph from the relevant store before publication.
Complete sets reduce beginner mistakes
For new workshops, the hard part is often not pressing the eyelet. It is buying parts that fit together. A complete kuşgözü workshop set can make the first setup easier by bundling a hand press with matching eyelets, punching dies, and setting dies. Sets with common sizes such as 10, 13, and 17 mm are useful for users who work on more than one product type.
The value of a complete set is confidence. Instead of guessing whether the punch, setting die, and press connection belong together, the user starts with one matched system. That does not remove the need for testing, but it does lower the risk of ordering parts that cannot be mounted or do not match the chosen eyelets.
Why the right eyelet system matters
The biggest benefit is a cleaner and stronger finish. A correctly punched and pressed eyelet supports the hole edge, spreads tension, and gives the final product a more professional look. It also improves consistency, which matters when a workshop produces many pieces that must look the same.
Correct tooling also cuts waste. If the hole is incorrect or the die setting doesn't match, the damage is often permanent. You can't always conceal a torn panel or crushed accessory. By checking size, connection, and material behavior in advance, operators save time, protect stock, and avoid delays.
There is also an ergonomic gain. Press tools reduce the guesswork and physical strain of repeated hammering. For anyone moving from occasional repair work into regular production, that gain can be as important as speed.
- Eyelet model or product code, inside diameter and barrel length
- Washer construction and front/back orientation
- Substrate type, finished thickness and reinforcement layers
- Press model and die attachment dimensions
- Expected batch volume and sample test findings
Information to share when requesting tooling
Compact hand tools can be appropriate for samples and limited repairs, while hand presses and powered equipment can make repetitive installations easier to control. A machine's advertised versatility is not evidence that a particular die will fit: obtain exact mechanical specifications first.
For sourcing and workshop planning, build the selection around the finished application. Begin with the textile or substrate, then confirm the fastener's actual dimensions and whether a washer is required. Match the punching method, setting geometry and press interface to that precise fastener. This structured approach matters when a production team needs consistent results across different operators and materials.
Planning a Grommet Tooling Setup with e-Buttons
No. The cutting and setting tooling must match the oval geometry.
Are oval grommets set with round dies?
Only where the exact fastener, die and substrate are approved for that process.
Can a self-piercing eyelet skip pre-punching?
No. These fastener families use different die geometries even when a compatible press platform can be shared.
Will one die work with snaps, capsules and eyelets?
PVC coating, reinforcement, folded seams and tension loads change the required setup and testing.
What is different about tarpaulin installation?
A hole that is too large, incorrect barrel height, mismatched washer or insufficient setting can all be contributing factors.
What causes a loose grommet?
No. Check the real product dimensions and its specified cutting diameter, then test on the final substrate.
Can I select a punch by nominal eyelet size alone?
No. The attachment interface, operating method, working clearance and load must all be checked.
Does every eyelet press fit every die?
No. Conventional systems use a cutting tool to make the opening and a separate setting die to form the fastener. Verified self-piercing systems are a special case.
Is an eyelet punch die the same as a setting die?
View eyelet and grommet setting dies and the broader press tooling family . These links point to verified e-Buttons pages; verify the site's English-language destination before adding language-specific deep links. Exact machine compatibility still needs to be checked at product level.
Explore the Relevant Product Families
| Operating context | Primary concern | Verification |
|---|---|---|
| Prototype or repair | Correct tool and controlled handling | Sample on matching material |
| Routine workshop work | Consistent alignment | Press and die interface |
| Tarpaulin and outdoor fabric | Layer construction and pull-out resistance | Reinforcement and inspection |
| Mixed fastener sizes | Model-specific dies | Individual compatibility checks |
e-Buttons Buying Decision Matrix
Frequently Asked Questions
Final takeaway
Eyelet installation works best when you think in systems: eyelet size, delme kalıbı, kuşgözü çakma aparatı, press connection, and material thickness all need to match. Manual tools are useful for small jobs, while a hand press or kuş gözü makinası gives better consistency for workshop production. Before you work on the final product, test the exact material and layer structure so every eyelet sits cleanly, grips firmly, and does the job well.
.webp-230x230.webp "Eyelet Setting Die for 4.5 mm / 0.18 in - 5 mm / 0.20 in Inner Diameter Eyelets KLP0002")
.webp-230x230.webp "Eyelet Setting Die for 4.5 mm / 0.18 in - 5 mm / 0.20 in Inner Diameter Eyelets KLP0002")
.webp-230x230.webp "Eyelet Setting Die for 8 mm / 0.31 in - 8.5 mm / 0.33 in Inner Diameter Eyelets")
.webp-230x230.webp "Eyelet Setting Die for 8 mm / 0.31 in - 8.5 mm / 0.33 in Inner Diameter Eyelets")
.webp-230x230.webp "Eyelet Setting Die for 9.5 mm / 0.37 in Inner Diameter Eyelets KLP0024")
.webp-230x230.webp "Eyelet Setting Die for 9.5 mm / 0.37 in Inner Diameter Eyelets KLP0024")
.webp-230x230.webp "Eyelet Setting Die for 13 mm / 0.51 in Inner Diameter Eyelets KLP0028")
.webp-230x230.webp "Eyelet Setting Die for 13 mm / 0.51 in Inner Diameter Eyelets KLP0028")
.webp-230x230.webp "Eyelet Setting Die for 9.5 mm / 0.37 in Inner Diameter Self-Punching Eyelet Die KLP0024D")
.webp-230x230.webp "Eyelet Setting Die for 9.5 mm / 0.37 in Inner Diameter Self-Punching Eyelet Die KLP0024D")
.webp-230x230.webp "Eyelet Setting Die for 8 mm / 0.31 in Inner Diameter Self-Punching Eyelet Die KLP0005D")
.webp-230x230.webp "Eyelet Setting Die for 8 mm / 0.31 in Inner Diameter Self-Punching Eyelet Die KLP0005D")
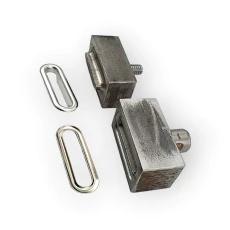
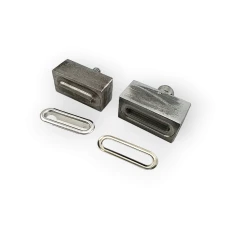
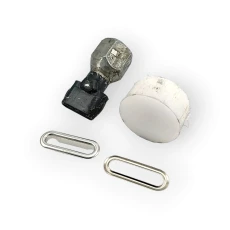
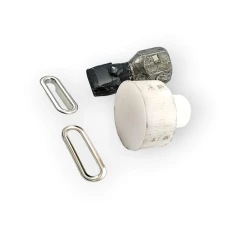
.webp-230x230.webp "Eyelet Setting Die for 17 mm / 0.67 in Inner Diameter Eyelets KLP0031")
.webp-230x230.webp "Eyelet Setting Die for 17 mm / 0.67 in Inner Diameter Eyelets KLP0031")
.webp-230x230.webp "Eyelet Setting Die for 28 mm / 1.10 in Inner Diameter Eyelets KLP0034")
.webp-230x230.webp "Eyelet Setting Die for 28 mm / 1.10 in Inner Diameter Eyelets KLP0034")
.webp-230x230.webp "Eyelet Drilling Die 13 mm / 0.51 in KLP0028DEL")
.webp-230x230.webp "Eyelet Drilling Die 13 mm / 0.51 in KLP0028DEL")
.webp-230x230.webp "Eyelet Punching Die for 8–8.5 mm / 0.31–0.33 in Inner Diameter Eyelets KLP00050DEL")
.webp-230x230.webp "Eyelet Punching Die for 8–8.5 mm / 0.31–0.33 in Inner Diameter Eyelets KLP00050DEL")
.webp-230x230.webp "Eyelet Setting Die for 13 mm / 0.51 in Inner Diameter Self-Punching Eyelet Die KLP0028D")
.webp-230x230.webp "Eyelet Setting Die for 13 mm / 0.51 in Inner Diameter Self-Punching Eyelet Die KLP0028D")
.webp-230x230.webp "7-Piece Eyelet Setting Die Set – 6 Sizes with Long-Handle Hand Setting Tool KLP002-028SET")
.webp-230x230.webp "7-Piece Eyelet Setting Die Set – 6 Sizes with Long-Handle Hand Setting Tool KLP002-028SET")
_7_11zon.webp-230x230.webp "Starter Canvas Eyelet Set – No. 28 Eyelets with Die and Hand Setting Tool BRANDA-NO28-SET01")
_3_11zon.webp-230x230.webp "Starter Canvas Eyelet Set – No. 28 Eyelets with Die and Hand Setting Tool BRANDA-NO28-SET01")